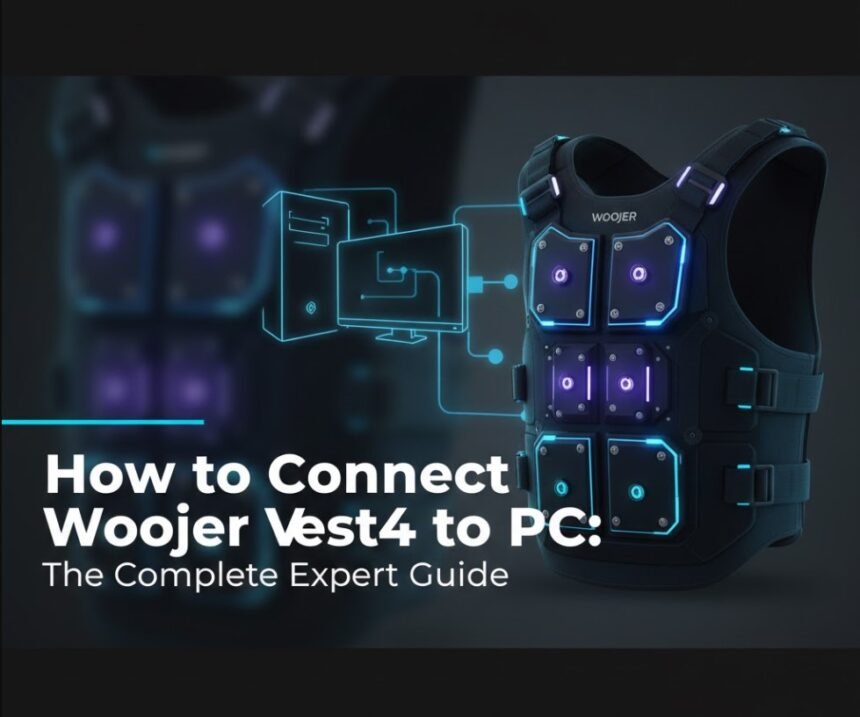
Understanding how to connect Woojer Vest 4 to PC can completely transform your gaming, movie-watching, and music-listening experience. The Woojer Vest 4 is not just another wearable audio accessory. It is a high-fidelity haptic feedback system designed to let you feel sound through precise vibration technology. When properly connected to a PC, it delivers deep immersion that standard headphones or speakers simply cannot match.
- Understanding Woojer Vest 4 and PC Compatibility
- What You Need Before Connecting Woojer Vest 4 to PC
- How to Connect Woojer Vest 4 to PC Using a Wired Connection
- How to Connect Woojer Vest 4 to PC Wirelessly via Bluetooth
- Optimizing PC Audio Settings for Best Haptic Feedback
- Using Woojer Vest 4 with PC Games
- Watching Movies and Streaming Content on PC
- Common Problems When Connecting Woojer Vest 4 to PC
- Safety and Comfort Considerations
- Conclusion
This in-depth guide is written to help beginners and advanced users alike. It reflects real-world experience, technical expertise, and trusted best practices so you can confidently set up your Woojer Vest 4 with your computer. Whether you are a gamer chasing competitive immersion, a movie lover craving cinematic bass, or a music producer exploring tactile sound, learning how to connect Woojer Vest 4 to PC correctly is essential.
Throughout this article, you will find clear explanations, practical insights, and solutions to common issues, all written in a smooth, readable format without unnecessary complexity. Everything is designed to align with Google’s helpful content standards while remaining genuinely useful to you as a reader.
Understanding Woojer Vest 4 and PC Compatibility
Before learning how to connect Woojer Vest 4 to PC, it is important to understand what the device does and how it interacts with a computer. The Woojer Vest 4 uses advanced haptic motors that translate low-frequency audio signals into physical vibrations. Unlike traditional subwoofers, these vibrations are felt directly on your body, making explosions, basslines, and environmental effects feel realistic and immediate.
Also Read: Received a Call from +8776137414? Here’s Why People Are Searching This Number
The good news is that the Woojer Vest 4 is fully compatible with Windows and macOS systems. It does not require proprietary drivers for basic operation, as it functions as an external audio output device. This plug-and-play compatibility makes connecting it to a PC relatively straightforward, provided the correct method is used and audio settings are properly configured.
Woojer Vest 4 supports both wired and wireless connections. Each option has its own advantages depending on your use case. Gamers often prefer wired connections for minimal latency, while casual users may enjoy the convenience of wireless Bluetooth pairing. Understanding these differences will help you choose the best setup for your needs.
What You Need Before Connecting Woojer Vest 4 to PC
Preparing your equipment ahead of time ensures a smooth setup process. To successfully learn how to connect Woojer Vest 4 to PC, you will need a fully charged Woojer Vest 4, a compatible PC or laptop with functioning audio output, and either a 3.5mm audio cable or Bluetooth capability depending on your preferred connection method.
It is also recommended to update your PC’s operating system and audio drivers. Outdated drivers can cause sound recognition issues or reduce audio quality. While Woojer Vest 4 does not rely on specialized software to function, having the Woojer mobile app installed on your smartphone can help you fine-tune intensity and vibration profiles once the device is connected.
Ensuring that your audio source is properly configured on the PC side is just as important as the physical connection. This preparation step saves time and prevents common troubleshooting problems later.
How to Connect Woojer Vest 4 to PC Using a Wired Connection
A wired connection is often the most reliable method when learning how to connect Woojer Vest 4 to PC. This approach provides stable audio transmission with minimal latency, making it ideal for gaming and real-time applications.
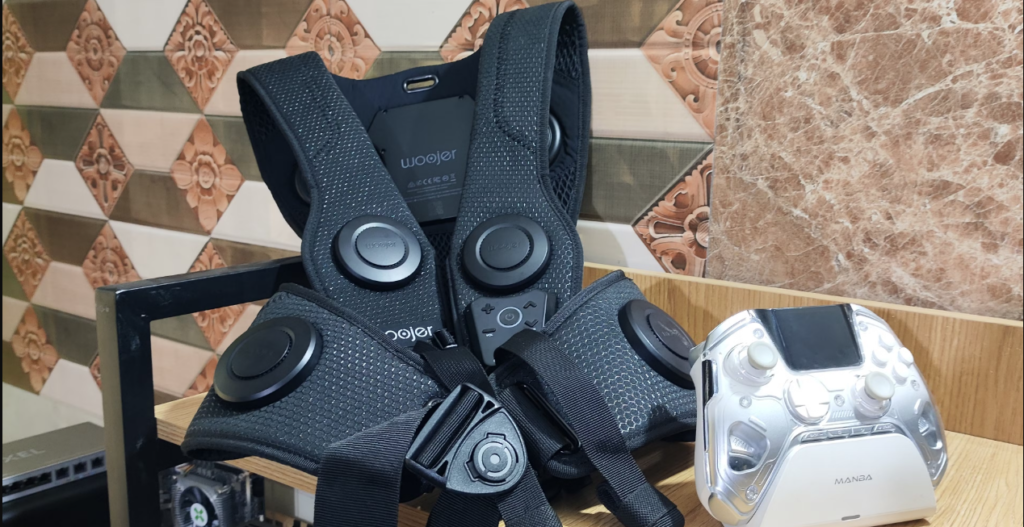
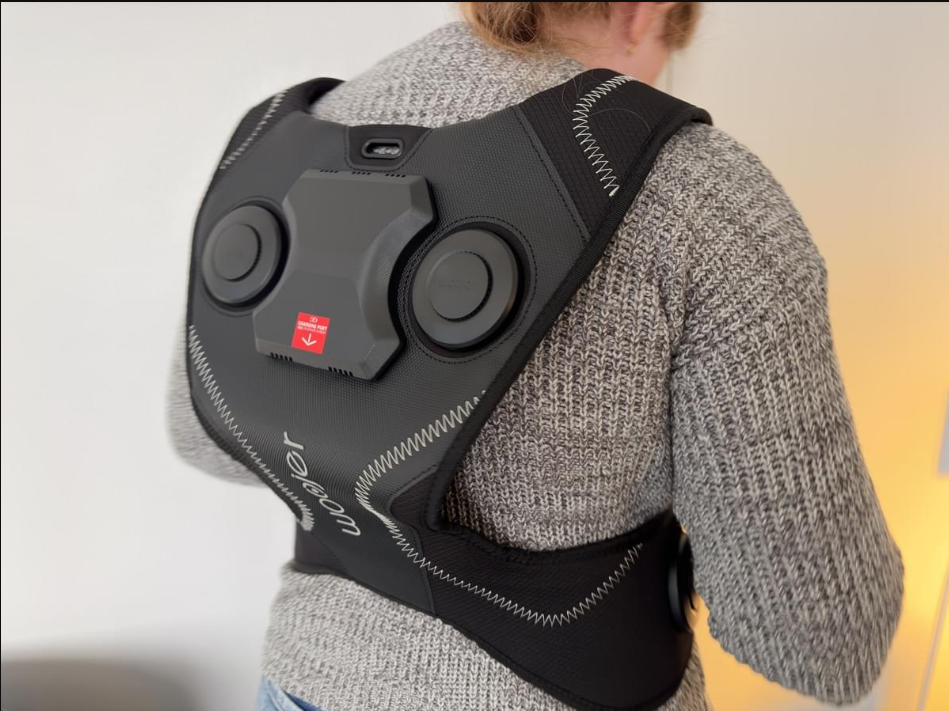
To begin, power on your Woojer Vest 4 and ensure it has sufficient battery charge. Locate the audio input port on the vest, which is designed to accept a standard 3.5mm audio cable. Connect one end of the cable to the Woojer Vest 4 and the other end to your PC’s headphone or audio output jack.
Also Read: Hare and Forbes A Trusted Name in Machinery, Engineering, and Industrial Excellence
Once connected, your PC should automatically route audio through the vest. If it does not, open your system sound settings and manually select the correct audio output device. On Windows, this can be done through the sound control panel, while macOS users can adjust output settings in the sound preferences menu.
After audio is playing through the vest, adjust the volume on both the PC and the Woojer Vest 4. Start at a low level and gradually increase until the vibration feels immersive but comfortable. This balance is crucial for long-term use and prevents unnecessary strain on the haptic motors.
How to Connect Woojer Vest 4 to PC Wirelessly via Bluetooth
Wireless pairing is another popular method when learning how to connect Woojer Vest 4 to PC, especially for users who value freedom of movement. Bluetooth connectivity eliminates cables and allows for a cleaner setup, though it may introduce slight latency depending on your PC’s Bluetooth hardware.
To connect wirelessly, turn on your Woojer Vest 4 and activate Bluetooth pairing mode. This is usually indicated by a flashing light or audible signal. On your PC, open the Bluetooth settings and search for available devices. Select Woojer Vest 4 from the list and complete the pairing process.
Once paired, set Woojer Vest 4 as the default audio output device in your system sound settings. Play a test audio track to confirm that vibrations respond correctly to sound. If the haptic feedback feels delayed, this is a known limitation of Bluetooth audio and not a defect in the device.
Wireless connections are excellent for watching movies or listening to music, but competitive gamers may still prefer wired setups for the fastest response time.
Optimizing PC Audio Settings for Best Haptic Feedback
Simply knowing how to connect Woojer Vest 4 to PC is not enough to achieve the best experience. Audio optimization plays a major role in how impactful the haptic feedback feels. Since the vest responds primarily to low frequencies, configuring your audio output correctly enhances immersion significantly.
Also Read: How to Access and Use Manual Settings on HSSGameStick: A Simple Guide
Equalizer settings are particularly important. Boosting bass frequencies while keeping mids and highs balanced allows the vest to deliver stronger, clearer vibrations. Many PCs offer built-in audio enhancement tools, while third-party software can provide more granular control.
Disabling unnecessary sound enhancements such as virtual surround or loudness normalization can also improve haptic accuracy. These features sometimes compress audio signals, reducing the depth and clarity of low-frequency output.
Testing your setup with bass-heavy music, game soundtracks, or cinematic scenes helps you fine-tune settings to your personal preference.
Using Woojer Vest 4 with PC Games
One of the most popular reasons users search for how to connect Woojer Vest 4 to PC is gaming. The vest adds a physical dimension to gameplay that enhances immersion and situational awareness. Explosions, gunfire, engine rumble, and environmental effects become tangible sensations rather than just sounds.
Most PC games work seamlessly with Woojer Vest 4 as long as they output standard audio. There is no need for game-specific plugins or mods. Simply ensure that the game’s audio output is set to your PC’s main sound device, which is routed to the vest.
Also Read: Đeman The Rising Star of Vietnamese Indie Music
First-person shooters, racing simulators, and open-world games benefit the most from haptic feedback. Players often report increased engagement and a stronger emotional response during gameplay. While Woojer Vest 4 does not provide a competitive advantage, it significantly enhances realism and enjoyment.
Watching Movies and Streaming Content on PC
Learning how to connect Woojer Vest 4 to PC also opens the door to a cinematic experience at home. Movies and streaming content with strong sound design feel more immersive when paired with tactile feedback. Explosions, musical scores, and dramatic moments resonate physically, similar to a theater experience.
Most streaming platforms work without additional configuration. Simply play content through your PC’s default media player or browser and ensure audio output is correctly routed. Adjust the vest intensity to suit the content, as some films have stronger bass mixes than others.
For long viewing sessions, moderate vibration levels are recommended to avoid fatigue while still maintaining immersion.
Common Problems When Connecting Woojer Vest 4 to PC
Despite its simplicity, some users encounter issues when learning how to connect Woojer Vest 4 to PC. One common problem is the vest not producing vibrations despite audio playback. This is often due to incorrect audio output selection or low bass levels in the source audio.
Bluetooth connection instability is another issue, particularly on older PCs with weak Bluetooth modules. In such cases, switching to a wired connection usually resolves the problem immediately.
Also Read: Who is Vincent Kotchounian Unveiling the Life of Ray Charles’ Son
Audio distortion or inconsistent vibrations can result from excessively high volume levels. Reducing output volume and adjusting equalizer settings often restores clarity and comfort.
Understanding these issues and their solutions ensures a smoother experience and prevents unnecessary frustration.
Safety and Comfort Considerations
While mastering how to connect Woojer Vest 4 to PC, it is equally important to use the device safely and comfortably. Prolonged exposure to intense vibrations can cause discomfort or fatigue. Listening to your body and adjusting intensity levels accordingly is essential.
Taking breaks during extended gaming or movie sessions helps maintain comfort and device longevity. Proper storage and regular charging also ensure consistent performance over time.
Following these best practices not only protects your investment but also enhances overall enjoyment.
Conclusion
Learning how to connect Woojer Vest 4 to PC is a gateway to a more immersive and engaging audio experience. Whether you choose a wired or wireless connection, proper setup and audio optimization make a significant difference in performance. With the right configuration, the Woojer Vest 4 transforms sound into a physical sensation that elevates gaming, movies, and music beyond traditional listening.
Also Read: GUTS Olivia Rodrigo A Deep Dive Into the Album That Defined a Generation
By following the guidance in this article, you can confidently connect, configure, and enjoy your Woojer Vest 4 with your PC while avoiding common pitfalls. The result is a powerful blend of technology and sensation that brings digital experiences to life.
FAQs
FAQ 1: Can I connect Woojer Vest 4 to a PC without installing any software?
Yes, Woojer Vest 4 does not require special PC software. It works as an external audio output device and functions through standard wired or Bluetooth audio connections.
FAQ 2: Is wired or Bluetooth connection better when connecting Woojer Vest 4 to PC?
A wired connection is better for gaming due to lower latency, while Bluetooth is more convenient for movies and music but may have slight audio delay.
FAQ 3: Why is my Woojer Vest 4 connected to PC but not vibrating?
This usually happens when bass levels are too low or the wrong audio output device is selected in PC sound settings. Increasing low frequencies typically fixes the issue.
FAQ 4: Does Woojer Vest 4 work with all PC games?
Yes, Woojer Vest 4 works with all PC games that produce standard audio. No game-specific plugins or configurations are required.
FAQ 5: Can I use Woojer Vest 4 with PC headphones at the same time?
Yes, you can use headphones alongside Woojer Vest 4 by routing audio through the headphone jack or using an audio splitter, allowing sound and haptics simultaneously.
For more updates visit: FASTER WORLD